Category: Gear

  • Hi-hat Microphone Mount

    Hi-hat Microphone Mount

    A quick review of the Big Bang Distribution Mic Mount, a really useful solution for miking up your hi-hat – without having another mic stand to cluttering up valuable studio floorspace.

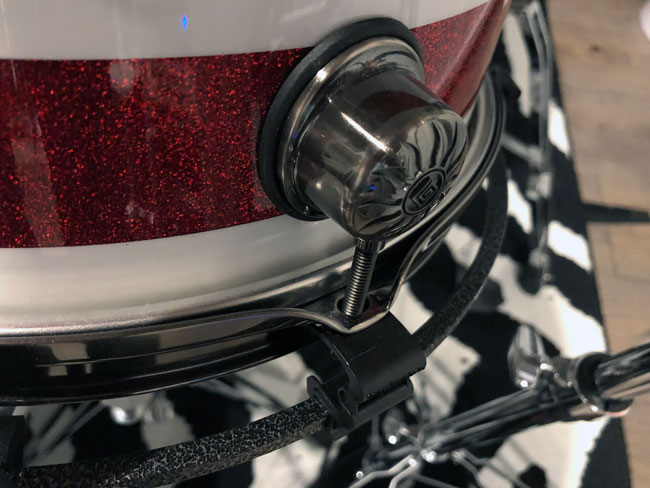
    It’s a simple design, but quite cleverly thought out, comprising a bracket for clamping the mounting arm to the hi-hat stand, and the mounting arm itself, which is height adjustable to provide enough room to mount a wide range of microphones.

    Big Bang Distribution Mic Mount and Rycote shockmount

    The only adjustability, apart from moving the main clamp up or down the hi-hat stand main tube, is the vertical extension bar (which the mic clip mounts on) giving approximately 10-12 cms additional height. However, there is no means of adjusting the horizontal width of the mounting arm, although I estimate that it could manage up to 17″ hi-hats, for those that like big hats.

    Side view of Mic Mount showing mounting bracket

    Another slightly negative point is that the main mounting bracket which clamps to the hi-stand stand is not quick-release, so there is some fiddling about with the bolts and washers each time you need to remove or re-mount it. Likewise, the vertical extension bar requires a drum key to unlock/lock the two bolts holding this bar in position. On the other hand, in a permanent, studio set-up, these are very minor points and should not put you off.

    Mic Mount for hi-hats, from Big Bang Distribution

    Overall, the build quality is pretty good, and certainly perfectly acceptable for the price (I think I paid around US$ 35 plus shipping).

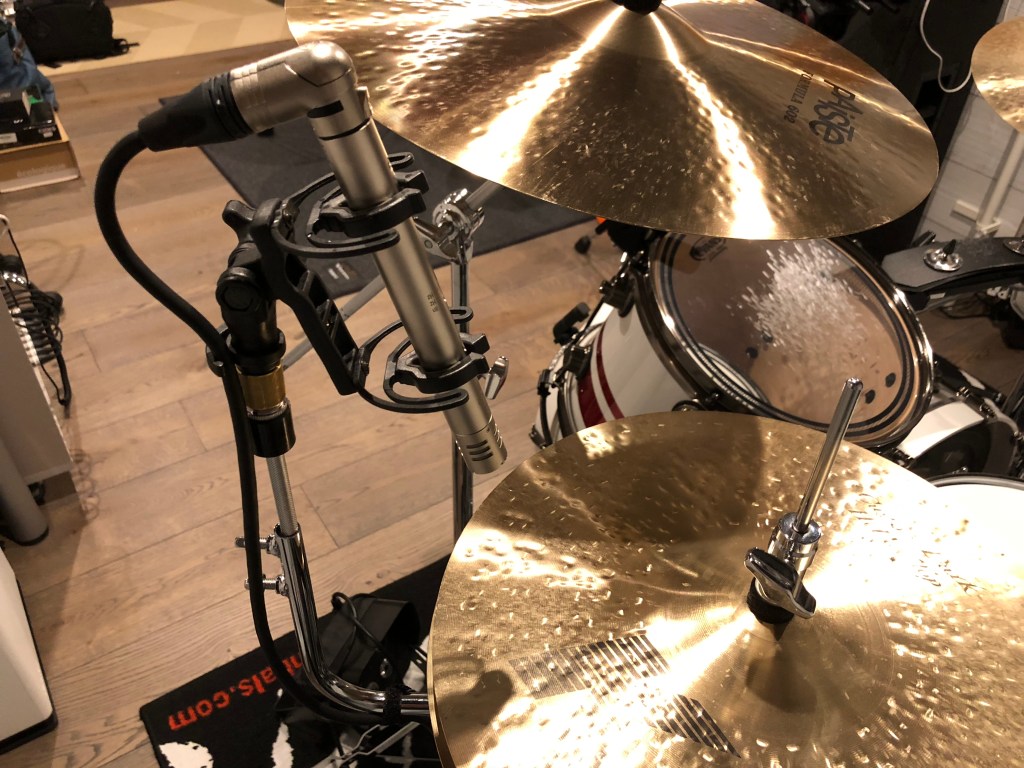
    The Mic Mount in Action

    Digging out my AKG C451 small diaphragm condensor microphone and mounting it to the Mic Mount took only a couple of minutes. I did have to use a 5/8″ female to 3/8″ male adaptor as the mic clip supplied with the C451 has a 3/8″ thread whereas the Mic Mount is 5/8″ – but you won’t need to if your mic clip has a 5/8″ thread.

    I did wonder about the mechanical transmission of noise to the mic, especially when doing lots of left foot pedal action, or really laying into sloshy open hats. Luckily, I had a rather nice Rycote shockmount clip lying around, and was therefore able to do some test recordings comparing the Rycote vs the standard solid plastic AKG clip.

    Why you need a shockmount

    Here are the recordings using both types of mic clip, with me playing a small variety of closed, open and pedalled hi-hat chicks.

    Standard solid plastic AKG mic clip

    Rycote Shockmount

    The difference is really obvious during the sections where I am laying into the open hats or pedalling, with a nasty rumble transmitted from the hi-hat stand to the microphone when using a standard solid mic clip like the one supplied with the AKG. The Rycote, on the other hand, was fantastic at isolating the mic and preventing any of this nastiness from reaching the mic capsule. I think this test shows just how good the Rycote shockmount is.

    Conclusion

    The conclusion is obvious: use a decent quality shockmount. Other than that, I think the Mic Mount is an excellent product, well worth its very reasonable asking price, and a great spacesaver when recording in a small room/studio.


  • Kick drum beaters – weight comparison

    Kick drum beaters – weight comparison

    Like nearly every other drummer out there, I have spent a fair amount of time fussing and fretting over my kick pedal, playing with the spring tension, beater angle, footboard angle – you name it, I’ve tweaked it. Each of us likes a particular feel from the pedal, and a lighter or heavier beater can quite drastically change that feel.

    Updated 26 December 2018

    Ok, but how to know which beaters are lighter or heavier, you ask. Good question. Some manufacturers do quote weights, especially for models that are specifically marketed as being very lightweight or heavy. However, based on the small collection of beaters I have accumulated (DW, Tama and Pearl), most of them have no weight info on their packaging or on the maker’s web site. So, I got out the kitchen digital scales and weighed them. Here are the results, from lightest to heaviest.

    Pearl DB100 Double beater

    Supplied stock with my Pearl Eliminator P-2050c pedal (the “Redline” version).

    • Weight : 84g
    • Beater material : Dual surfaces – Felt and Plastic

    Pearl DB100 supplied with P-2050c Eliminator pedal

    Pearl B250QB Control Core Quad Beater

    • Weight 89g
    • Beater material: Felt and plastic

    This has 4 different playing surfaces plus a moveable counterweight. Pearl claims that the “Control Core” construction gives better shock absorption capabilities. Personally, I don’t notice any difference to the Pearl DB100 in that respect.

    Pearl B250QB Control Core Quad Beater

    Tama CB900PS Power Strike

    • Weight : 89g
    • Beater material : Felt

    Described as being for Tama’s Iron Cobra pedal, this beater can also be used with Speed Cobras.

    Tama CB900PS Power Strike beater

    DW SM101 Air

    Very similar to the stock beater supplied with the DW 9000, but lighter weight. I currently use this with my DW 9000. However, this beater is only 8g lighter than the stock SM101 beater. Personally, I don’t feel much difference.

    • Weight : 97g
    • Beater material : Dual surfaces – Felt and Plastic

    DW SM101 Air Kick Drum beater

    Tama PB90F Felt beater for Speed Cobra

    • Weight : 101g
    • Beater material : Felt

    Tama PB90F Felt Beater Speed Cobra

    DW SM104W Black Sheep (Rich Redmond)

    This is the Rich Redmond signature beater from DW, featuring a black stained wooden beater, moveable weight, and a removable black fleece beater cover.

    • Weight : 103g (without fleece cover)
    • Weight :108g (with fleece cover)
    • Beater material : Wood

    DW SM104W Black Sheep KIck drum beater (Rich Redmond), without fleece cover

    DW SM104W Black Sheep KIck drum beater (Rich Redmond), with fleece cover

    DW SM101 – Stock 9000 beater

    This is the beater supplied with the DW 9000 pedal.

    • Weight : 105g
    • Beater material : Dual surfaces – Felt and Plastic

    DW SM101 Beater - included with DW 9000

    DW SM110XL Beater

    • Weight : 122g (82g without the weights)
    • Beater material : Dual surfaces – Felt and Wood

    At more than three times the price of some of the other beaters shown here, this is perhaps DW’s flagship replacement beater. Large striking area, interchangeable felt and wooden strike surfaces, and removable weights (4 x 10g brass weights), the latter providing plenty of customization possibilites for those that need the ultimate in tweakability. For the average drummer, probably overkill!

    DW SM110 XL Control Beater

    Pedal feels slow? Try a lighter beater. Pedal lacks some punch? Try a heavier one.

    Conclusions

    With the lightest at 84g and the heaviest at 122g, there is quite a wide range of weights here, the heaviest (DW SM110XL) weighing 50% more than than the lightest (Pearl DB100).

    The low weight of the Pearl was a bit of a surprise as it is a physically large beater head, so I was expecting it to weigh more. But looks can be, and clearly are in this case, deceiving.

    In terms of flexibility, there’s much to be said for the DW SM110XL, thanks to its removable weights. Once all weights are removed, this would be the lightest beater in this comparison, albeit by a tiny 2g. Personally, I would prefer this pedal to have the option of a plastic pad, rather than wood, although many great drummers swear by wooden beaters.

    It should also be mentioned that some of these pedals come with a movable weight, and that the position of this weight along the shaft (closer or further away from the beater) will have a significant effect on the perceived heaviness and power of the beater when in use.

    Given that all the great drummers have their own preferences, yet still sound amazing, we probably shouldn’t get too hung up on this sort of thing. It was a fun exercise to do, and interesting to see the results, but at the end of the day it’s technique that counts – not the gear.

  • Natal Originals in the studio

    Natal Originals in the studio

    Been doing a lot of work recording and filming recently, and couldn’t resist posting this.

    Natal Originals Birch kit in the studio

    • Kick 22 x 18
    • Rack Tom 12 x 9
    • Floor Tom 14 x 12
    • Floor Tom 16 x 14
    • Gretsch Taylor Hawkins Snare
  • Gauger Percussion Flex Frame

    Gauger Percussion Flex Frame

    Mounting a rack tom on a snare stand gives added flexibility in positioning the tom, and in my opinion looks cool, but the downside for me was a choked sound. Fitting a Gauger Percussion Flex Frame has cured that and now I have a loud and resonant tom again! Highly recommended.

    Although I use a top of the range (and expensive) DW 9399 Tom/Snare stand for mounting my 12″ rack tom, in preference to hanging the tom off a cymbal stand, this type of mounting arrangement can really choke the sound of the tom. I was always careful to not clamp the tom in the stand’s basket, the tom just sitting there held in place by gravity, and even though the DW 9399 is fitted with additional isolation pads on the basket arms, the tom never sounded full and resonant.

    The Gauger Percussion Flex Frame (no affiliation) comprises a metal ring (the Frame), nicely finished in a hardwearing powder coating, and 6 plastic clips for mounting the frame to the drum. I have the 12″ version, which comes with 6 clips (other sizes come with additional clips as needed), and also bought a spare set of 6 clips just in case they don’t stand up to wear and tear when changing heads, tuning, etc. The whole lot cost me under $50, which I thought was reasonable.

    Gauger Flex-Frame Tom - Close-up of mounting clip

    Mounting the Flex Frame took only a few minutes (including re-tuning the resonant head), and is a simple matter of loosening off the tension rods, sliding in the mounting clips, tightening up the rods and re-tuning the head, then finally clipping the Frame itself into the clips. Really, a 5 to 10 minute job max.

    Gauger Flex-Frame Tom - Close-up of mounting clip

    The diameter of the Frame is a little larger than the drum hoop, but in my case doesn’t extend beyond the lugs, so shouldn’t be problem for those needing to pack their tom in a case – the drum will fit in its case with the Frame fitted.

    Gauger Flex-Frame - Frame held by snare stand

    Does it work? Yes it does. I noticed an immediate improvement in sound, with all choking gone, and the tom now sounds how it should – full and resonant. Probably the best $50 I’ve spent on drum gear.